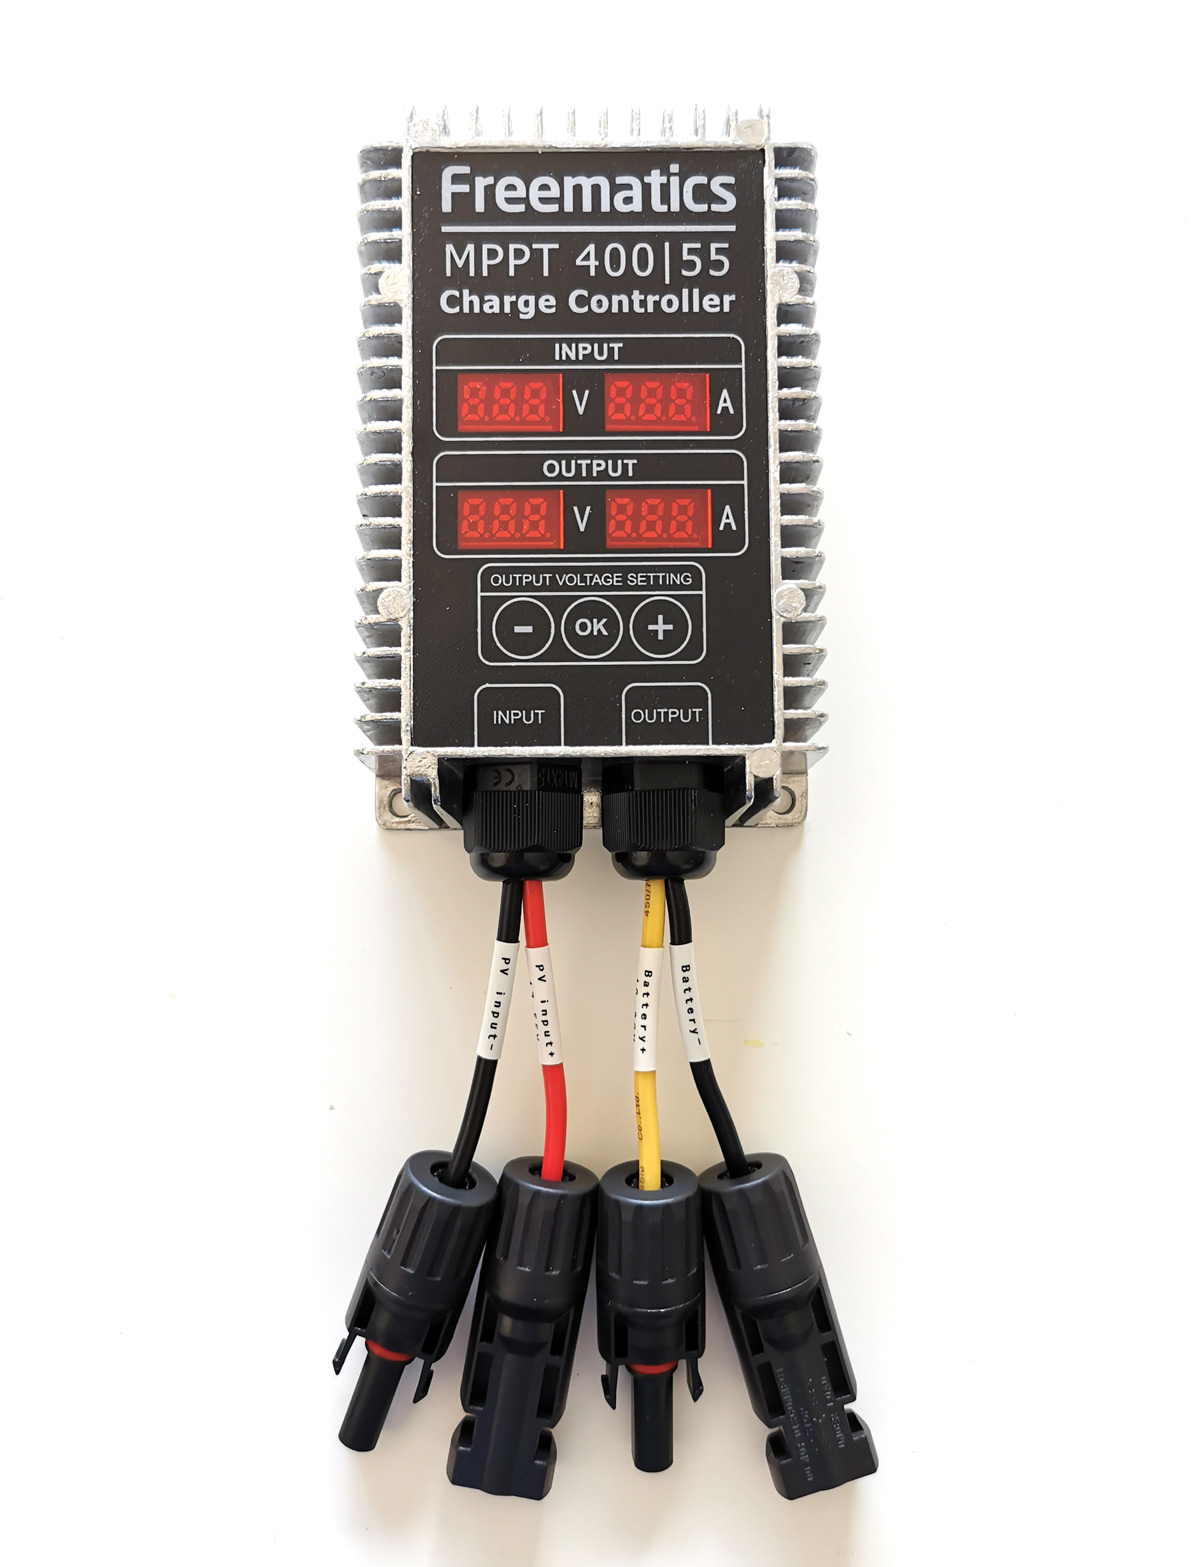
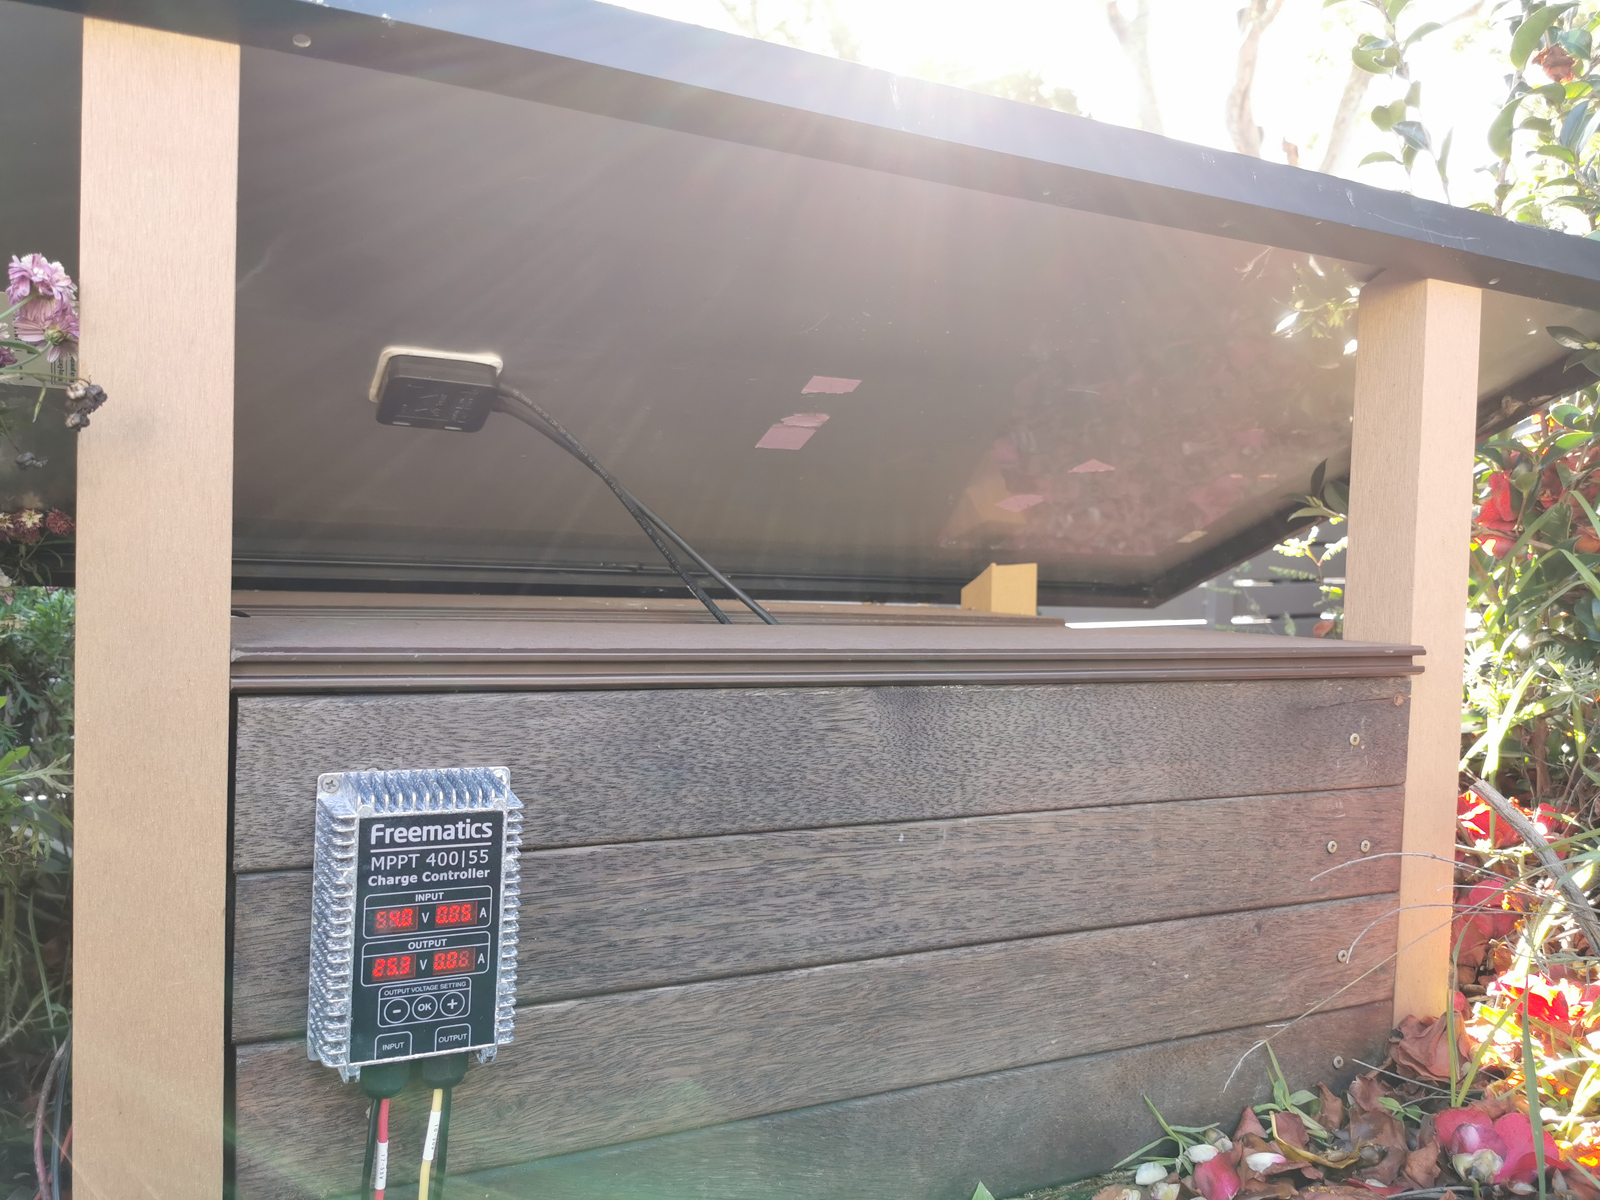
Freematics DC-DC MPPT Charge Controller comes with a rugged, weatherproof and fanless design which makes it suitable to be installed in outdoor settings or any vehicles. It adapts any solar panels (up to 55V) to any types of batteries (8.4-30V) at an optimum charging performance. Being able to work standalone or in parallel, it is also adaptive to all kinds of scenarios whether for a caravan, a shed, any solar powered facilities, or a large-scale off-grid system.
Feature Highlights
- Outstanding MPPT performance and DC-DC conversion efficiency
- Galvanized steel enclosure with passive cooling design
- IP66 waterproof, dust-proof, vibration-proof
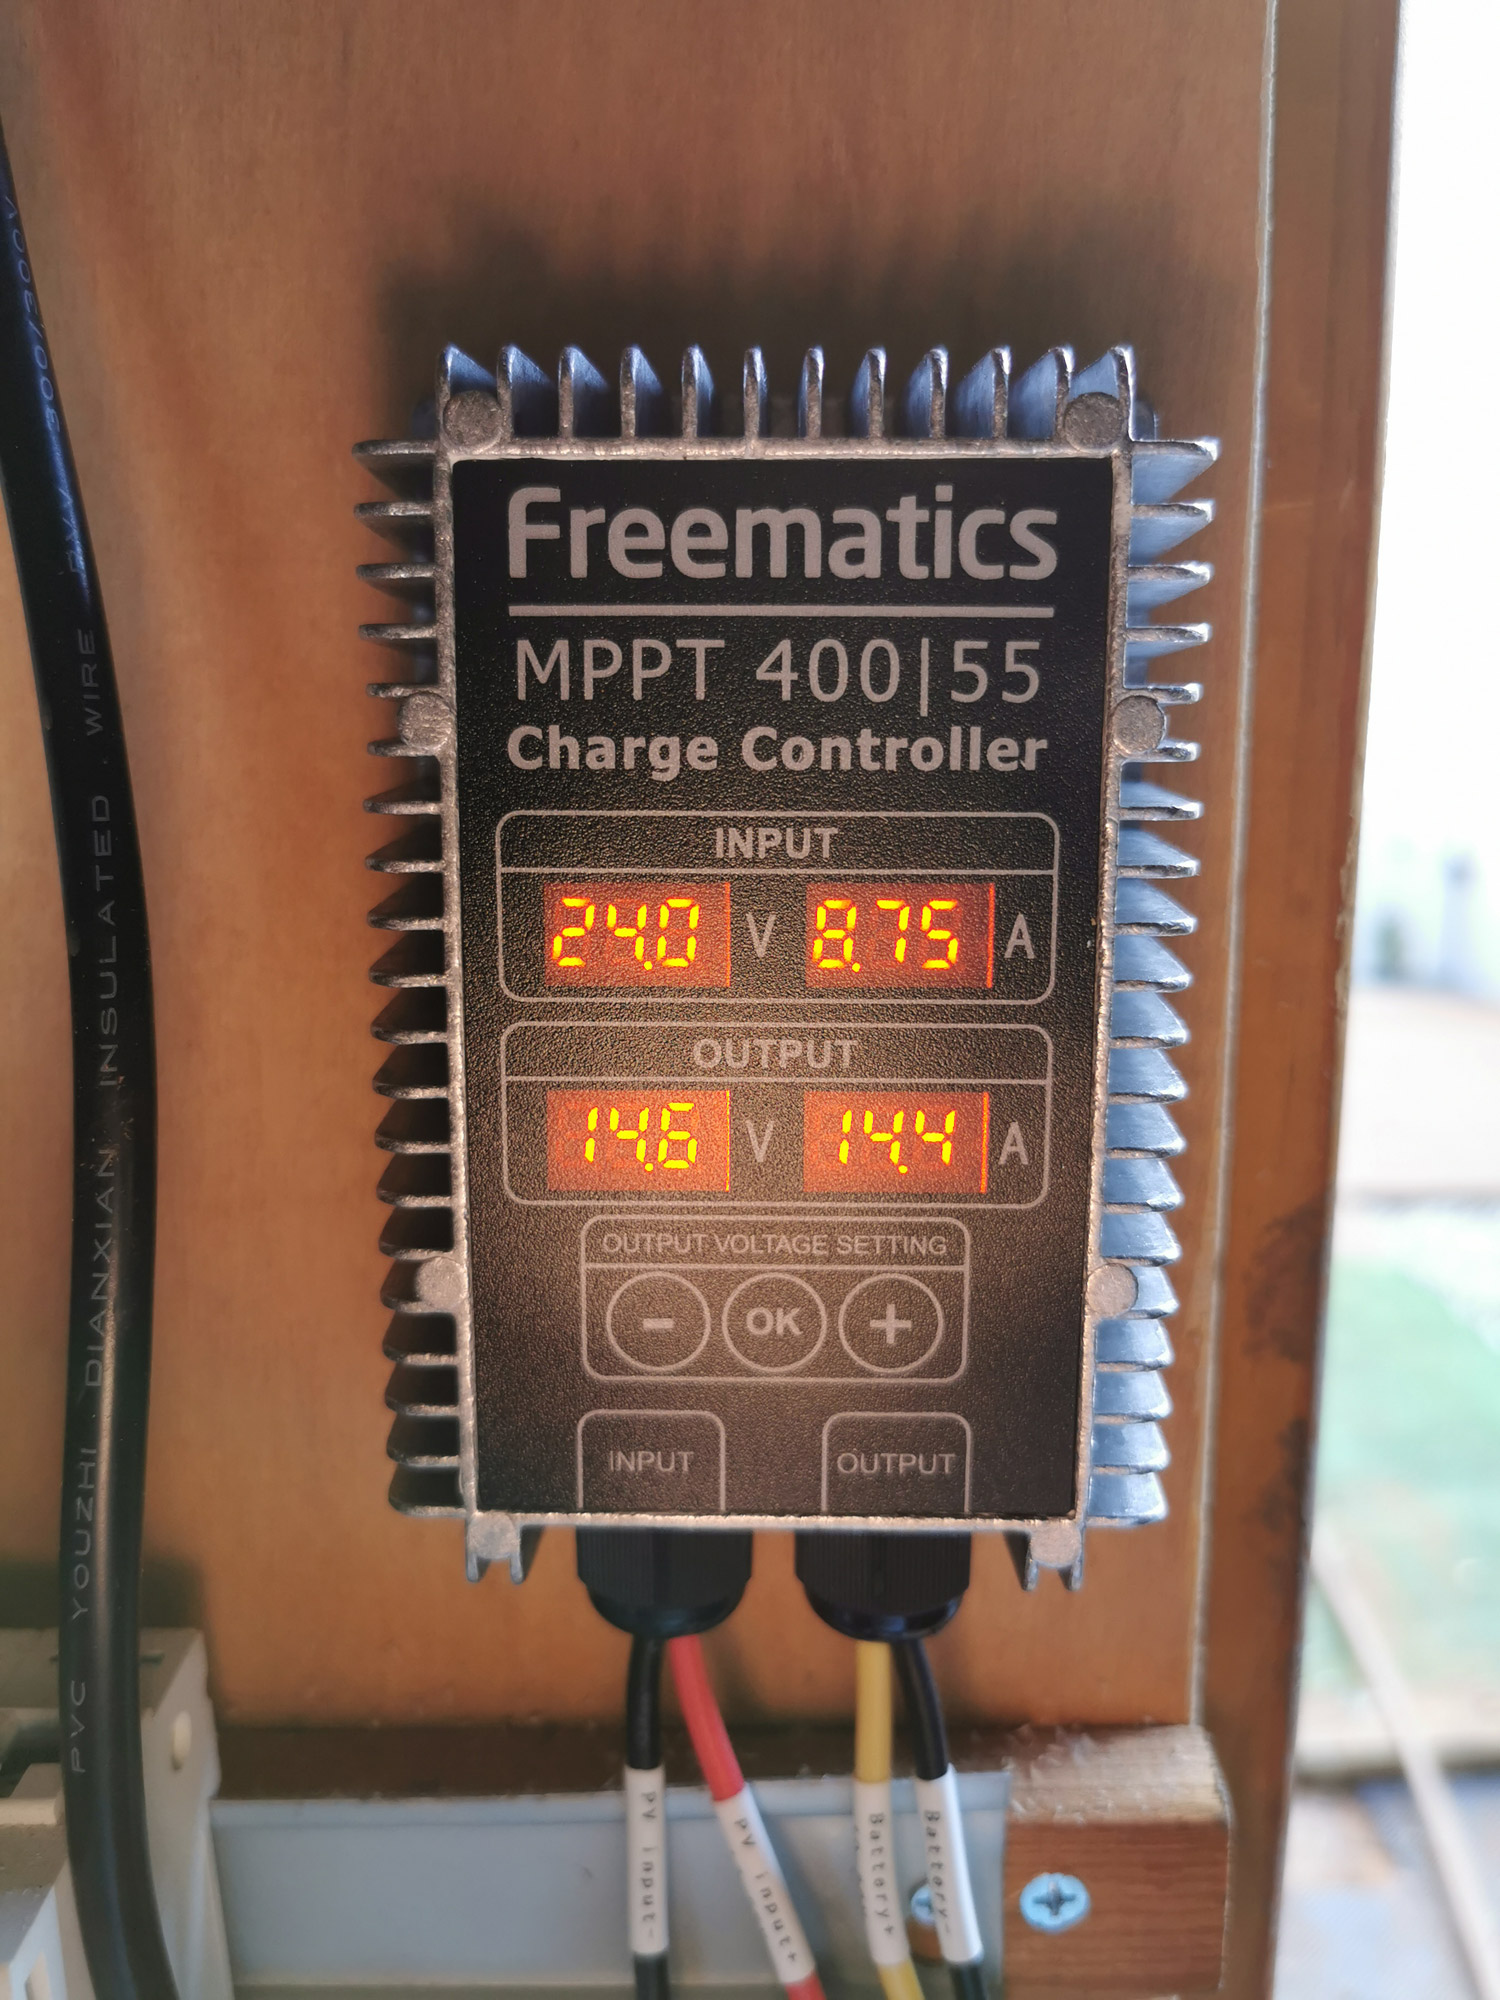
- Live display of input/output voltage and current
- Supporting solar panels with open-circuit voltage up to 55V
- Universal battery support (8.4-30V, any types)
- Over-heating protection and short-circuit protection
- Works as solar charge controller or DC-DC charge controller
Quick Guides
Standalone Mode
In standalone mode, the input of charge controller is connected to one or several solar panels and the output connected to battery. The charger controller is able to output up to 400W power regardless of total capacity of connected solar panels. Since solar panels rarely work at their maximum rating, it is common and safe to connect higher capacity of solar panels to the charge controller to achieve best performance and cost-effectiveness.
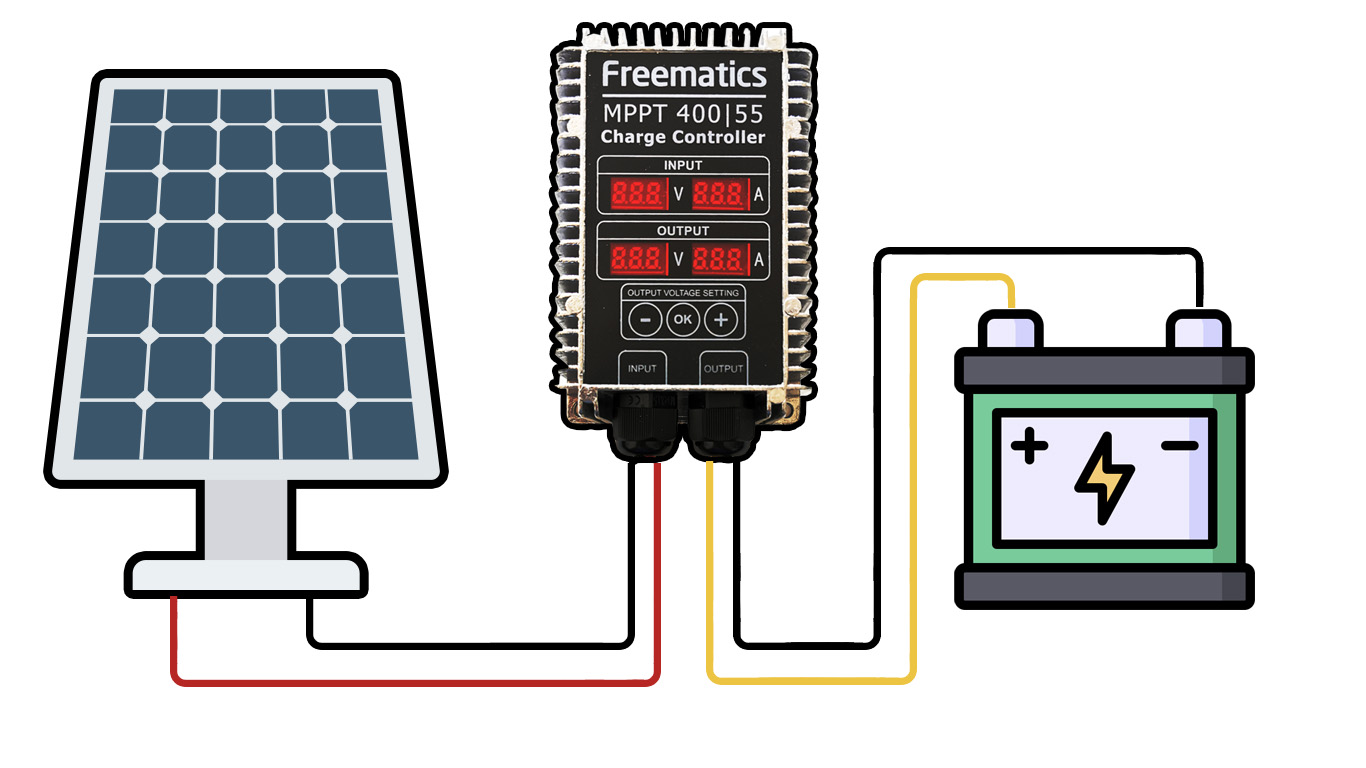
Step 1 – Connecting solar panels
Connect the output of solar panel (normally in MC4 connectors) to the input of the controller (also available with MC4 connectors). To connect multiple solar panels, use MC4 splitters to join multiple pairs of MC4 connectors into one and connect to the charge controller. Be very aware to connect +/- correctly.
Step 2 – Adjusting output voltage
If solar panel outputs enough voltage, the digits on charge controller will light up. Press +/- buttons to adjust the output voltage to the fully charged voltage of the battery and then press OK button to store the value.
Step 3 – Connecting batteries
Connect the +/- of battery to the charge controller and it’s done. Be very aware to connect +/- correctly.
Parallel Mode
In parallel mode, each group of solar panels are connected to one charge controller. Output of all charge controllers are connected to the same battery. This allow each group of solar panels to work at their own maximum power point and achieve higher overall efficiency than a single controller.
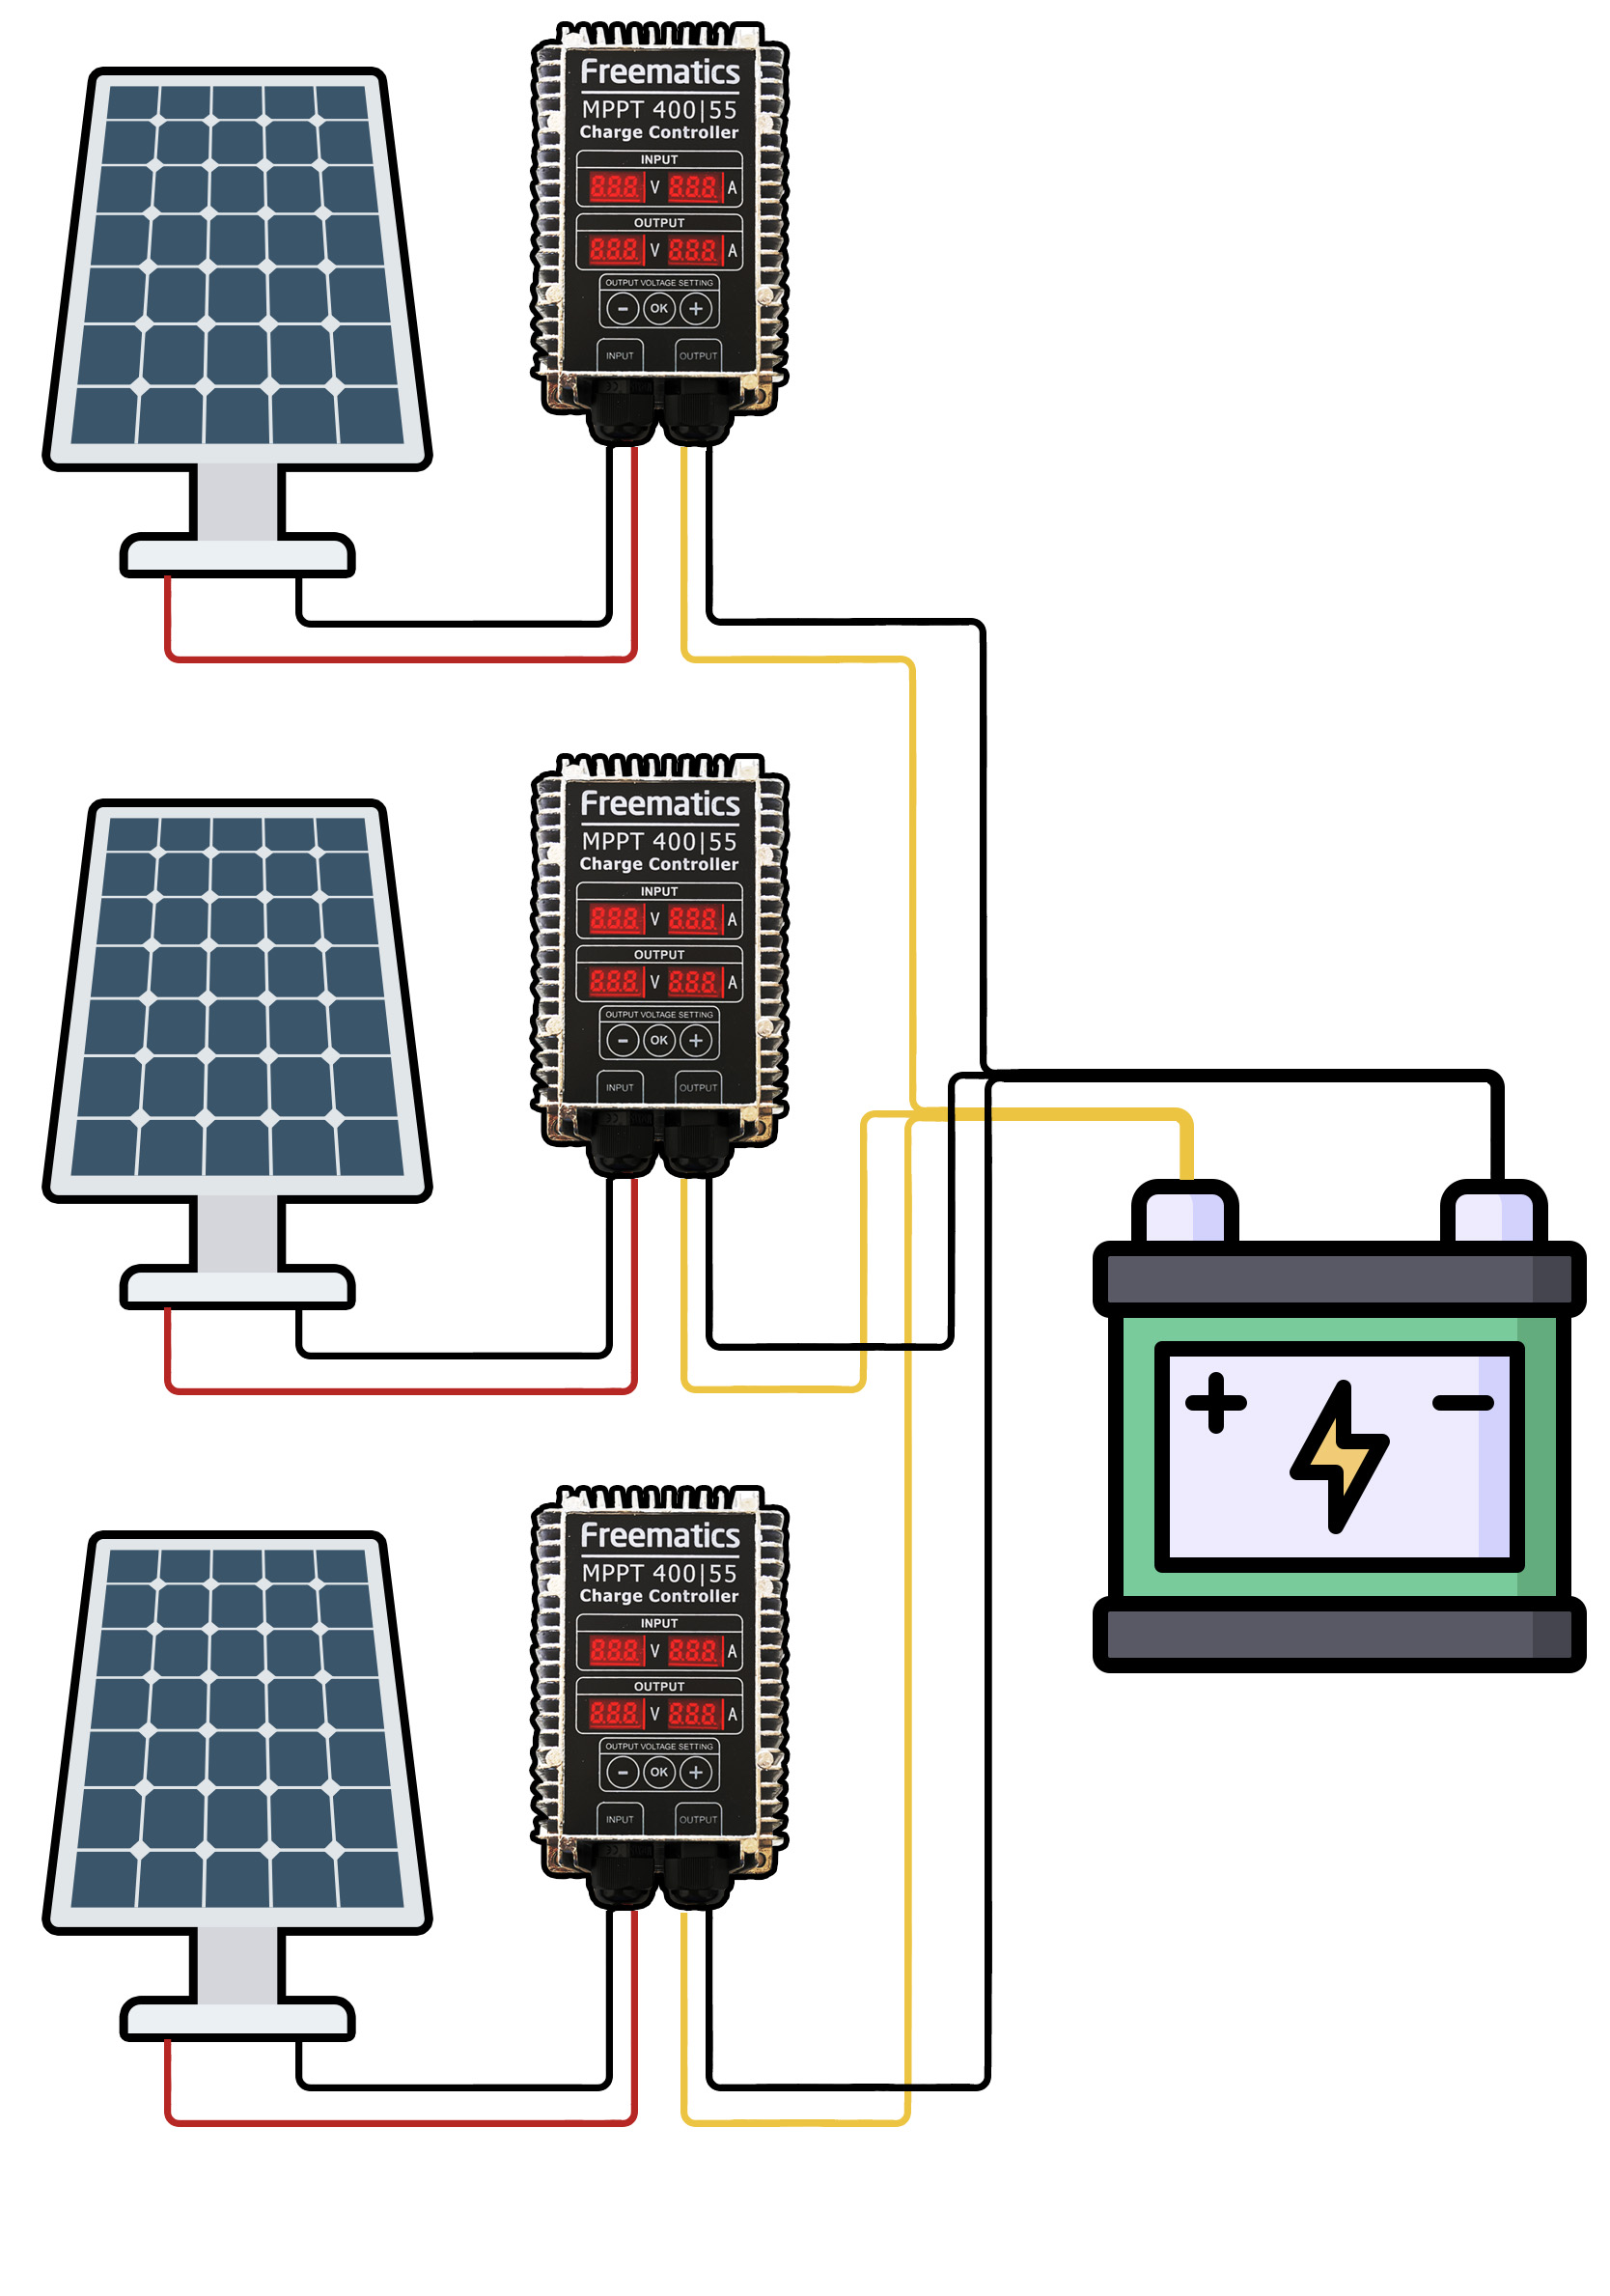
Step 1 – Connecting solar panels
Connect the output of each group of solar panel(s) to one charge controller. Be very aware to connect +/- correctly.
Step 2 – Adjusting output voltage
Press +/- buttons to adjust the output voltage of each charge controller to the fully charged voltage of the battery and then press OK button to store the value.
Step 3 – Connecting batteries
Connect the battery +/- lines of each charge controller to the same battery. Be very aware to connect +/- correctly.
Note: Parallel connection with charge controllers of other brands is not guaranteed to work.
Specifications
Supported Batteries
Input Solar Panel Open-circuit Voltage
Maximum Power Point Voltage
Maximum Output Power
Maximum Output Current
Idle Overhead
MPPT Conversion Rate
Output Short-circuit Protection
Output Reverse Connection Protection
Output Under-Voltage Protection
Over-Current Protection
Over-Heating Protection
Waterproof Rating
Working Temperature
Enclosure Dimensions
Weight
Any types (lithium, lipo, gel, lead acid) with a full charge voltage between 8.4V and 30V
21V-55V
17V-55V
400W
15A
0.35W
99%
Yes
No
Yes
Yes
Yes
IP66
-40-65°C
120x80x40mm
490g
Warranty
This product comes with one-year replacement warranty. Please be cautious reversed connection of input could damage the product and will void the warranty.
Links
- Maximum power point tracking – Wikipedia
- Solar micro inverter – Wikipedia
- DC-DC conversion efficiency explained