This is an open-source Arduino development kit working as a GPS data logger and tracker. It includes Freematics Esprit (ESP32 based), a 1.3″ OLED display and a 10Hz GNSS receiver, plus our well developed Arduino sketches and libraries.
Parts list
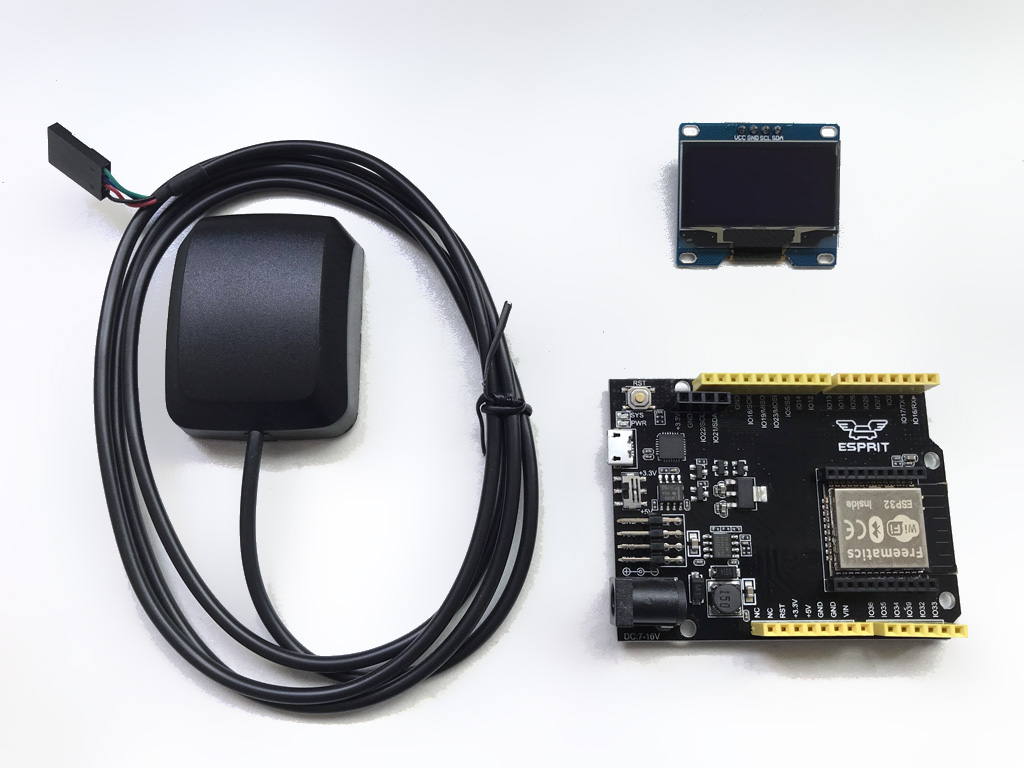
The kit consists of following parts.
- Freematics Esprit ESP32 Dev Board
- 1.3″ OLED Display
- M8030 10Hz GNSS Receiver for Arduino
- MicroUSB Cable (optional)
Put together
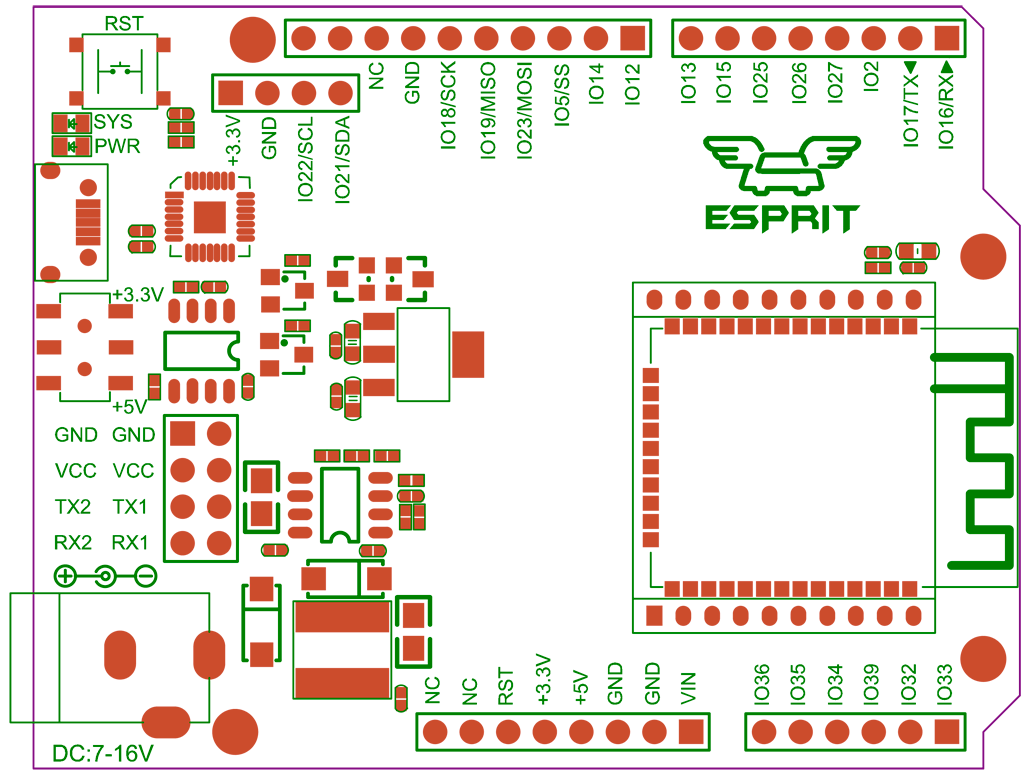
The kit is completely plug-and-play. Freematics Esprit is in Arduino UNO form factor with extra pinouts for I2C and serial UART. It can be powered from USB port or DC jacket (up to 16V).
Assembling Steps
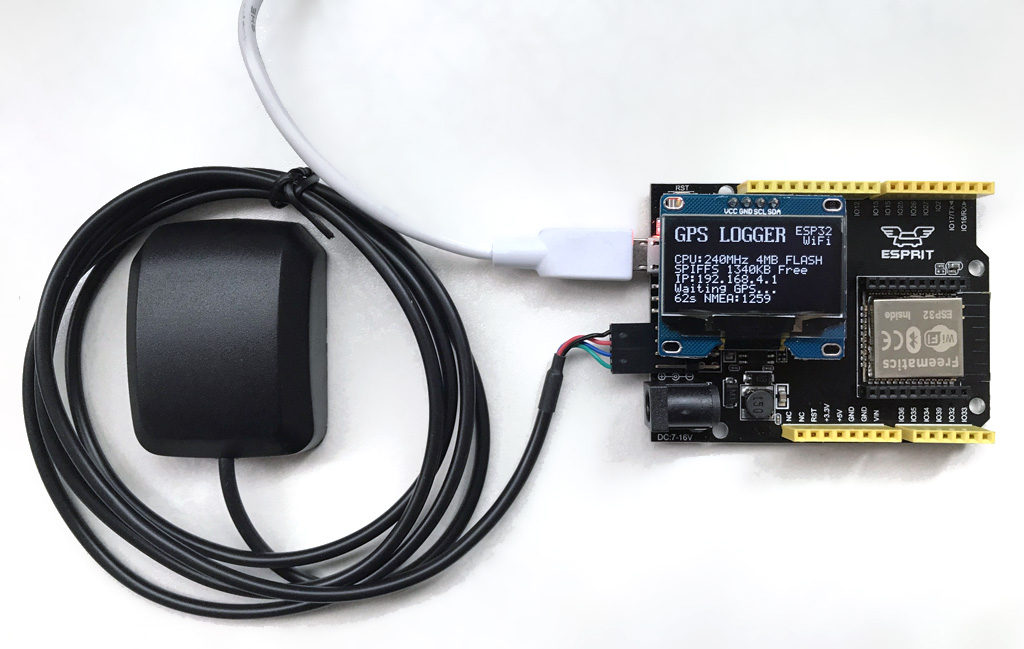
- Plug the OLED display into the onboard I2C socket
- Plug the 4-pin Dupont connector of the GNSS receiver to the onboard 4-pin UART connector (lower one)
Start simple
Let’s get started with the simple one. Simple_gps_test is a sketch performs a simple task. It decodes NMEA data stream from the GNSS and output the parsed data to USB serial. The sketch makes use of the multiple hardware serial UARTs of ESP32, with one for USB serial output and one for GNSS UART. This sketch does not display anything on the OLED display so it can remain unplgged. TinyGPS library is used for NMEA decoding. If you use Arduino IDE, make sure to import the library.
Quick guide for compiling and uploading code with PlatformIO
- Download and install PlatformIO IDE (Visual Studio Code or Atom based)
- Connect Freematics Esprit board to computer by USB cable
- Launch IDE, choose File menu and then Open Folder, choose the folder containing the code (.ino file)
- Click upload button on toolbar to start uploading
- Click serial monitor button to view output

To the real world
The kit can work as a fully functional GNSS data logger and Traccar client, with this sketch which features:
- Receiving and decoding NMEA stream from GNSS receiver
- Logging GNSS data in the built-in flash (file based, using SPIFFS)
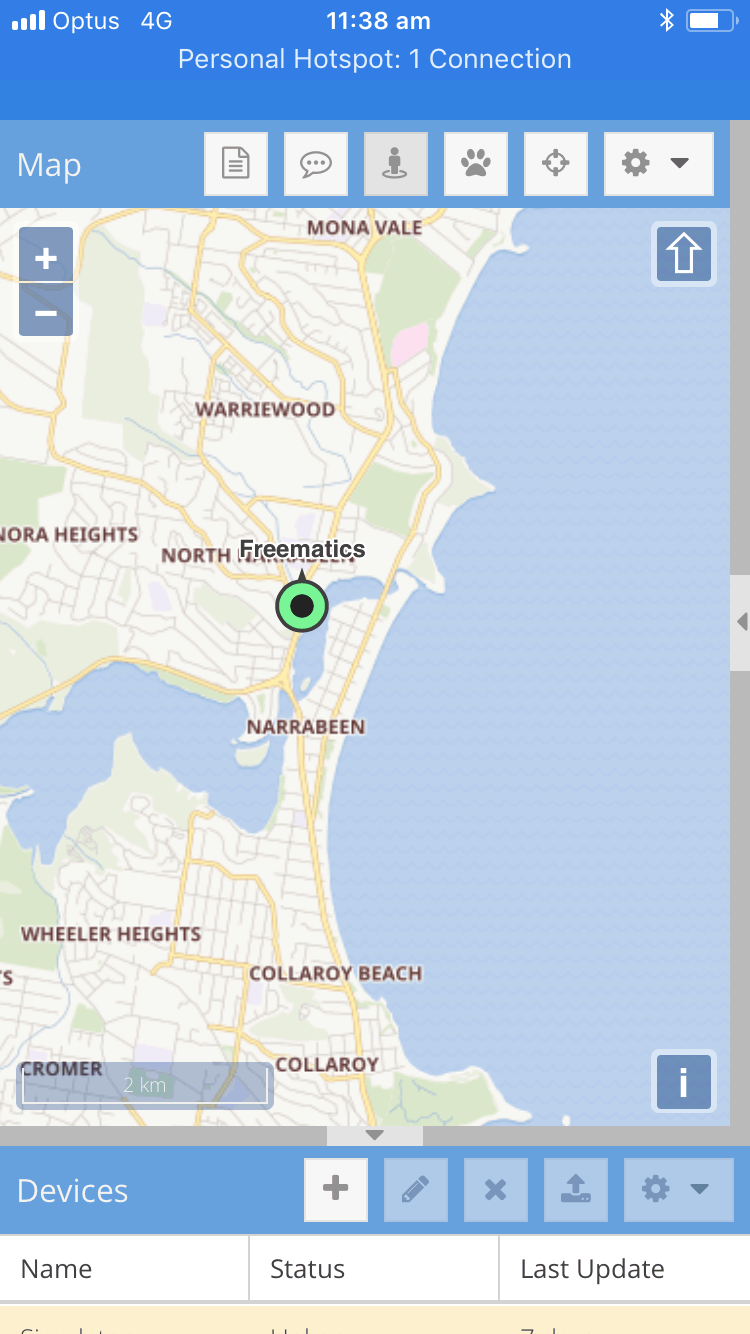
- Connecting to Traccar server via built-in WiFi to report real-time GNSS data (as a Traccar client)
- Running a HTTP server for remote access to real-time and logged data via WiFi (AP and station)


Besides compiling and uploading the code with PlatformIO, you can get better experience by using Freematics Arduino Builder which provides a configuration UI for this sketch.
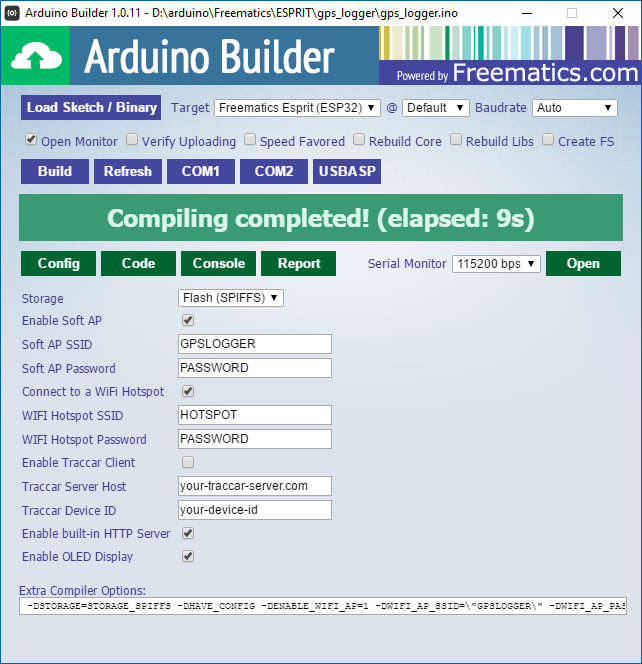
Quick guide for compiling and uploading code with Freematics Arduino Builder
- Download and install Freematics Arduino Builder
- Connect Freematics Esprit board to computer by USB cable
- Launch Freematics Arduino Builder
- Click Load Sketch button to load the sketch (.ino file)
- Set board type to Freematics Esprit
- Change settings display on the config tab
- Click on serial port to start compiling and uploading
Links
Order Now