This is the world’s most cost-effective development kit designed for vehicle telemetry projects. It features ECU data access via OBD port, GPS+GLONASS geolocation and cellular network connectivity, packed into an easy-to-use Arduino library for makers or developers familiar with Arduino. The kit works out-of-box as a connected vehicle data tracker while can also be easily programmed as an Arduino UNO to do something else.
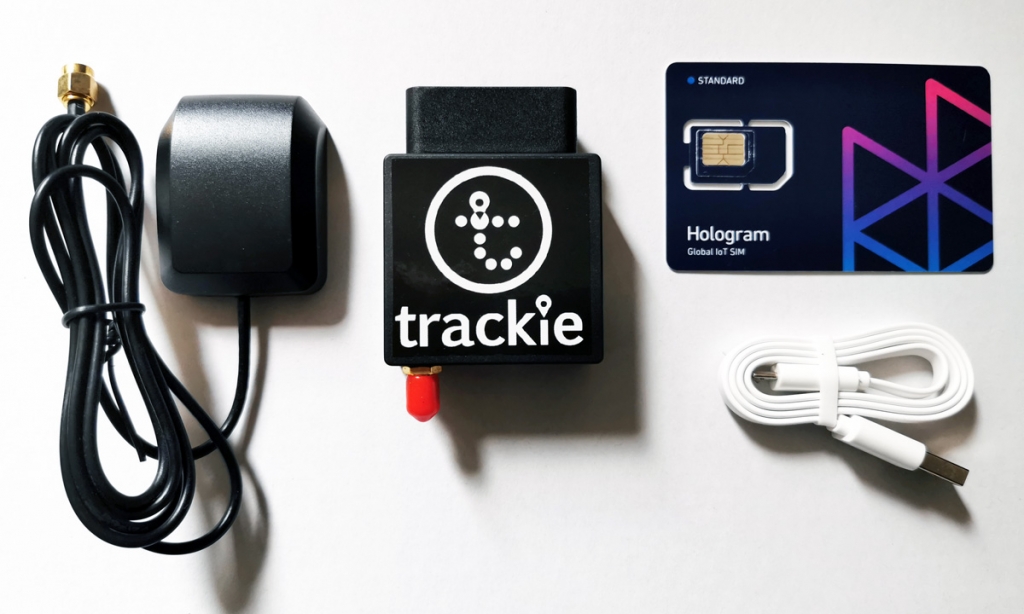
The kit consists of following items.
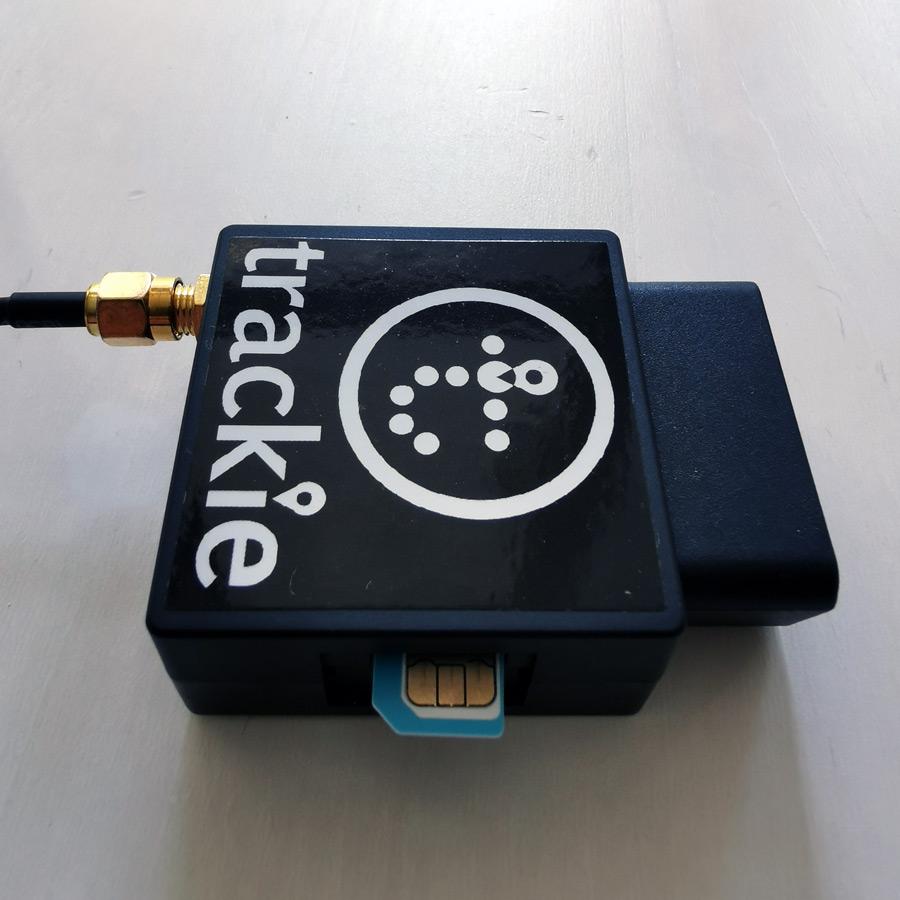
- Freematics ONE with SIM5360 cellular module
- GPS Antenna (SMA connector)
- Hologram Global IoT SIM Card
- Micro USB cable
Vehicle ECU Data
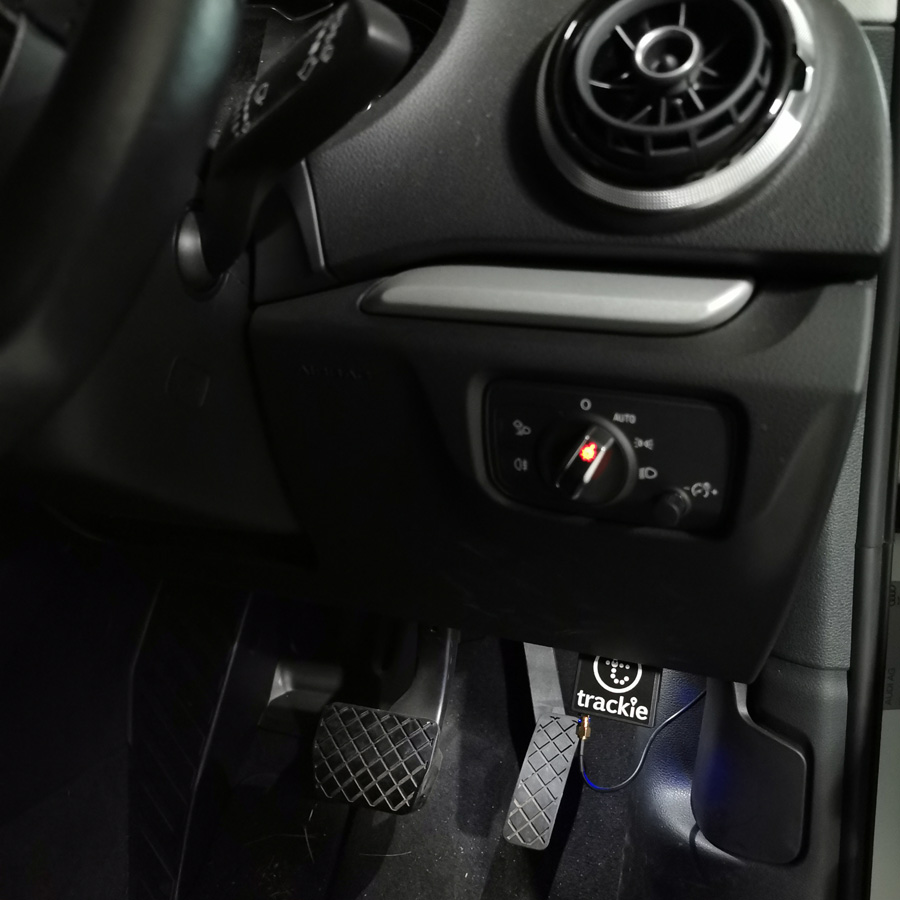
Freematics ONE as a OBD dongle plugs into car’s OBD port, communicates with car’s ECU to obtain some vehicle data from ECU and is also powered from the port.
Geolocation Data
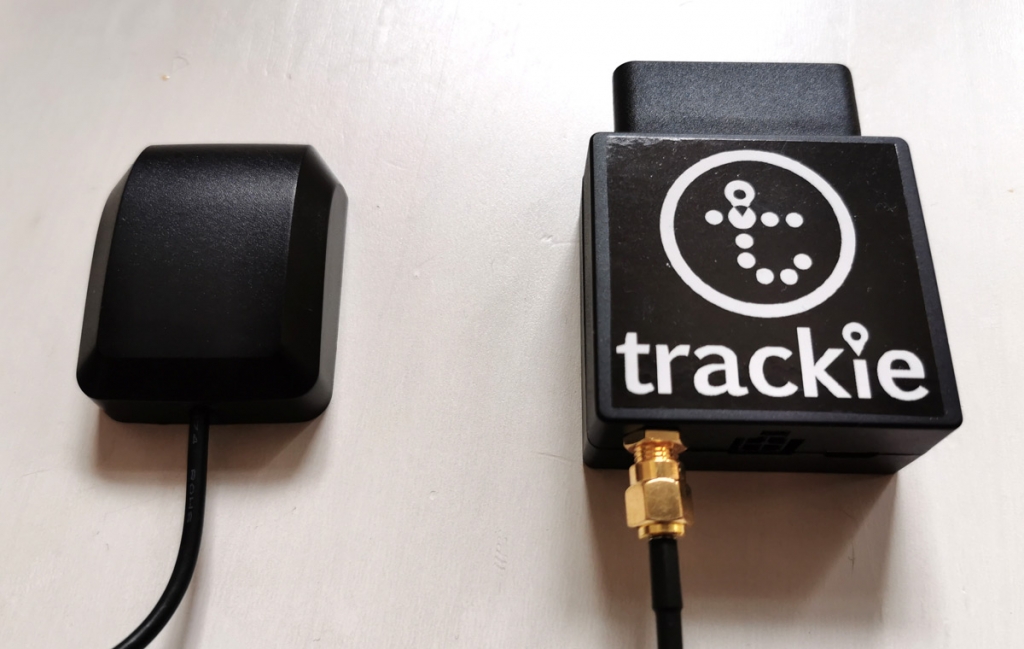
SIM5360 cellular module has integrated GNSS (GPS+GLONASS). Antenna unit must be attached to the SMA port for the GNSS to work.
Cellular Network
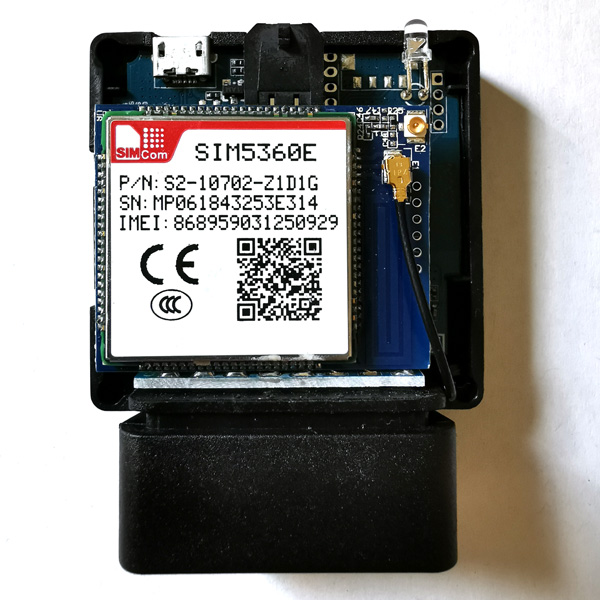
SIM5360 cellular module provides WCDMA and GSM cellular network connectivity. There are two variants for SIM5360. SIM5360A is for most carriers in the North America while SIM5360E is for most other regions.
| SIM5360E | SIM5360A | |
|---|---|---|
| GSM/GPRS/EDGE | Quad-Band 850/900/1800/1900MHz | Quad-Band 850/900/1800/1900MHz |
| UMTS/HSPA+ (WCDMA) | Dual-Band 900/1900MHz | Dual-Band 850/1900MHz |
| Regions | Europe, Asia, Australia* | US, Canada, Australia* |
* Australia has both 3G bands in operation by different operators. Complete worldwide 3G band information is here.
The kit comes with a Hologram Global IoT SIM card which can be used in in over 196 countries across 550 carriers. To insert the SIM card into the device, pop out the card in Micro SIM size (the middle one of three), remove the side cover of your device and insert the card in the direction shown below.
For testing or casual use, we highly recommend to activate the hologram SIM card under Maker Edition.
Compiling and uploading
The kit comes with firmware pre-flashed and it will work out-of-box. So you can skip this if you are not going to change anything or doing development.
Freematics ONE is literally an Arduino UNO connected with some peripherals in the form of a OBD dongle. A sketch has to be uploaded to get it working. We provide fully functioning sketches for various purposes so you can get started easily. After playing well with it, you can evolve your own sketch with features you need.
Followings are the steps for compiling and uploading sketch to Freematics ONE.
1. Download and install Arduino IDE
Arduino IDE can be downloaded from Arduino website.
2. Import Arduino library for Freematics ONE
Download Freematics ONE Arduino library package. Launch Arduino IDE. Choose menu Sketch->Include Library->Add .ZIP Library and select the downloaded zip file. The library will be imported and new items will appear in the Examples menu.
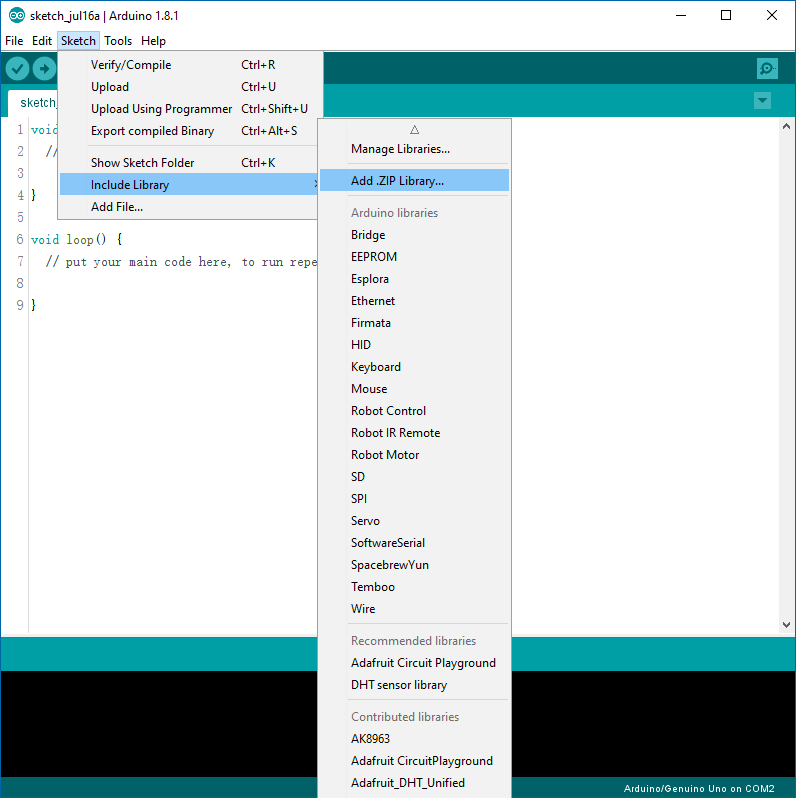
Load sketch telelogger from Examples menu.
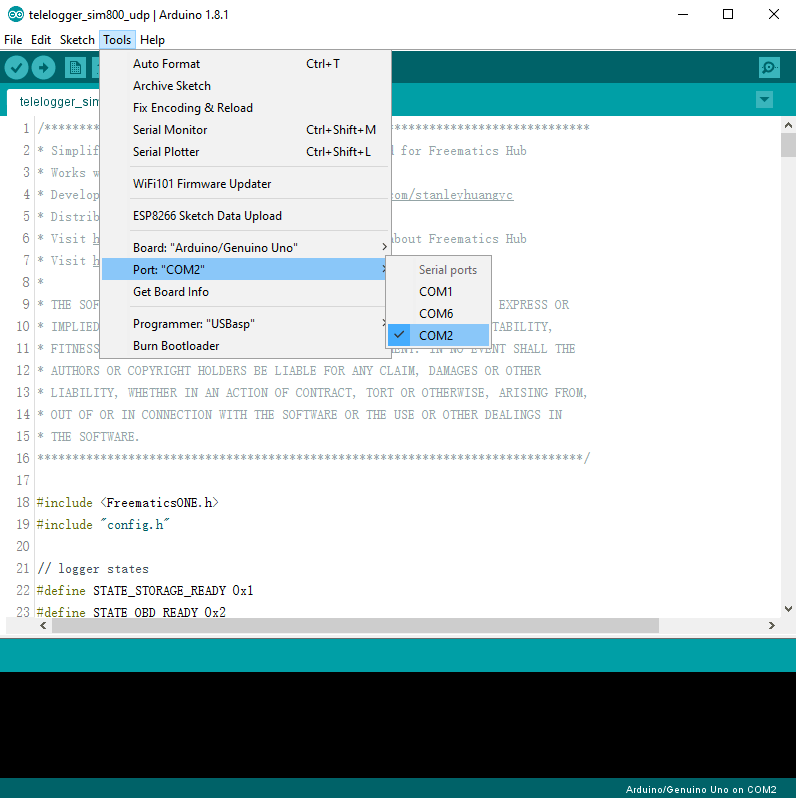
3. Compile and upload
Choose Arduino Uno as board and select the serial port of Freematics ONE, and click the Upload button to start compiling and uploading.
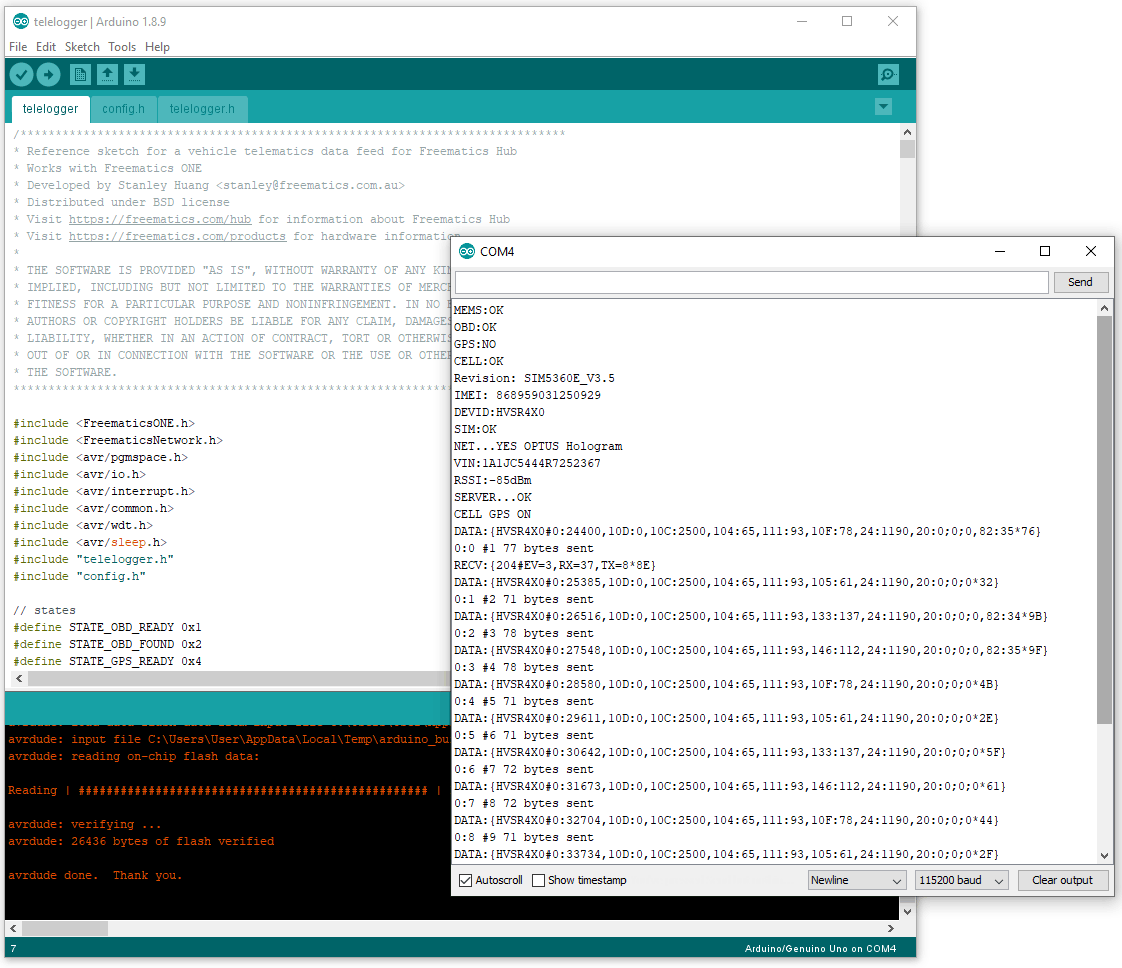
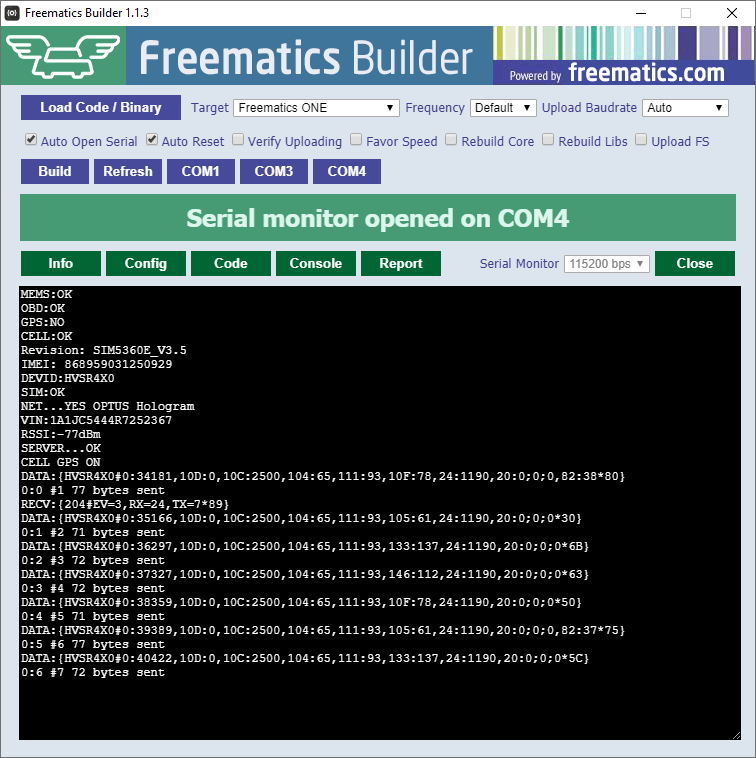
Once uploading successfully completed, connect Freematics ONE to car’s OBD port and see it running from serial monitor. With everything good, the sketch runs like following.
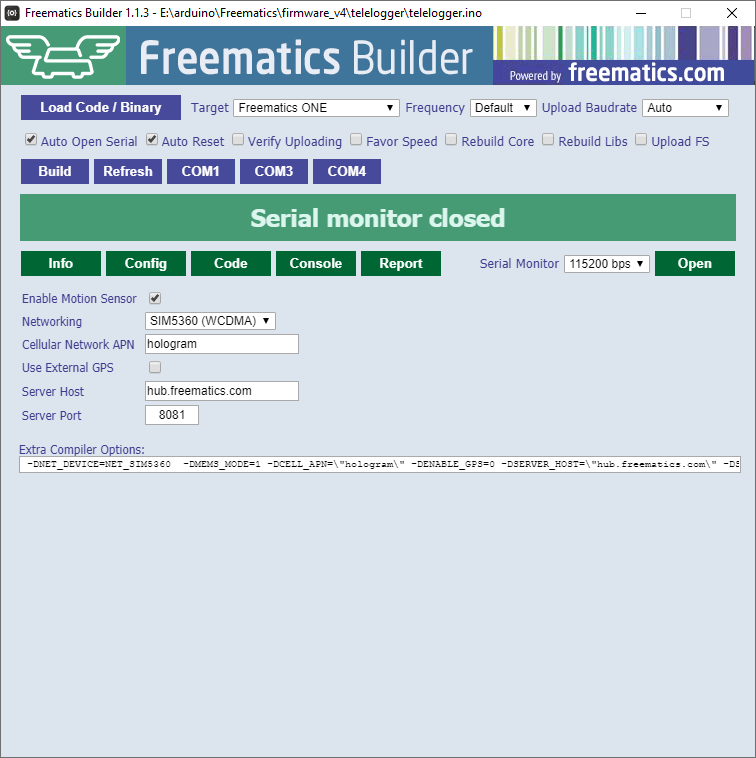
Alternatively, you can use Freematics Builder to compile and upload code. This tool provides a config UI, automatically compiles and uploads to a selected device, and open serial monitor by one click.
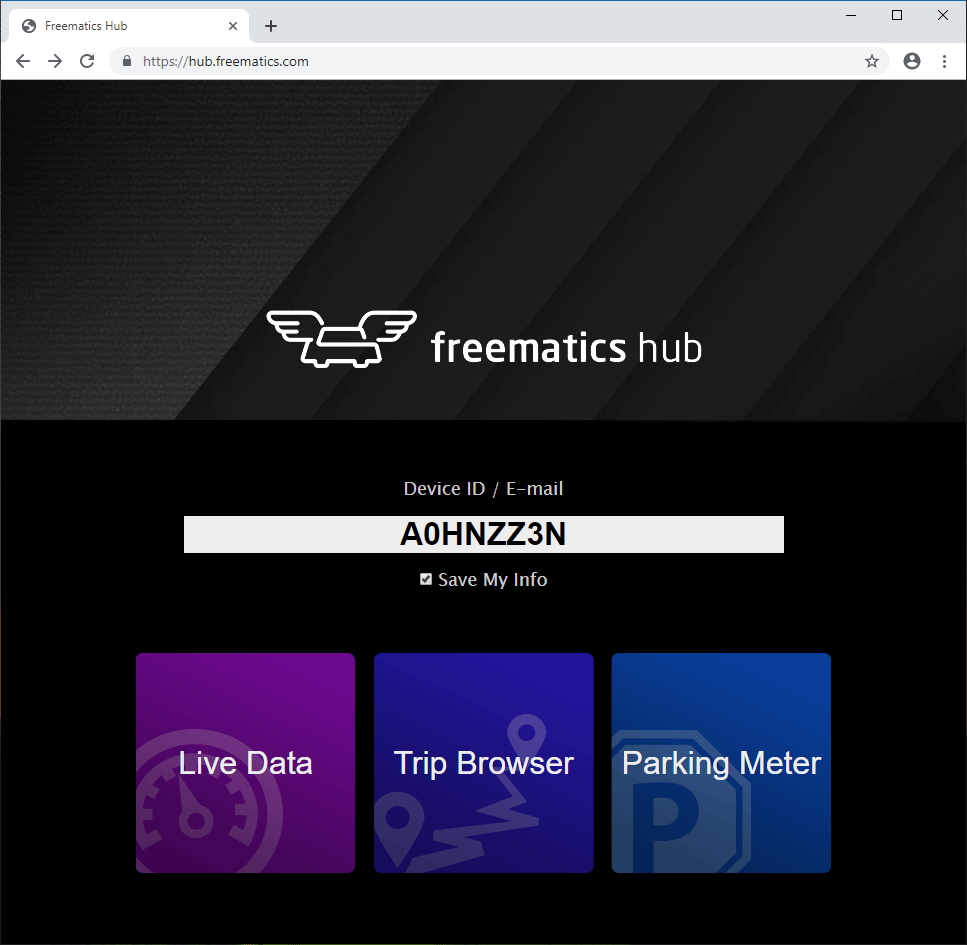
Viewing live and historic telemetry data
Once the device starts to work (when its blue LED constantly flashing), head to hub.freematics.com from web browser on any devices (phone or computer) and enter your device ID which you can find from serial output or the device label (if there is one). Refer to this article for a brief introduction about Freematics Hub service.
Order Now
The kit can be ordered from our online store.
Shipping List
- Freematics ONE *1
- SIM5360A or SIM5360E cellular module (plugged in) *1
- GPS antenna with SMA connector *1
- MicroUSB cable *1
- Hologram Global IoT SIM Card *1 (optional)